Powered by Blogger.
Showing posts with label mulch. Show all posts

1/3 Of The Way There!

July 05, 2013

Hey, heyyy blog buddies! I hope everyone had a wonderful 4th of July, and hopefully a four day weekend off from work. ;) 

I have been dying to share a project with you guys, and it's actually not even complete. We are maybe 1/3 of the way there, but it's just so pretty I couldn't help it. Like many of the other outdoor projects we've taken on, my parents helped BIG TIME with this one. Let's just say, they know how to clear out an overgrown jungle like it's nobody's business. We first learned of their capabilities when we bought the house...eeek!

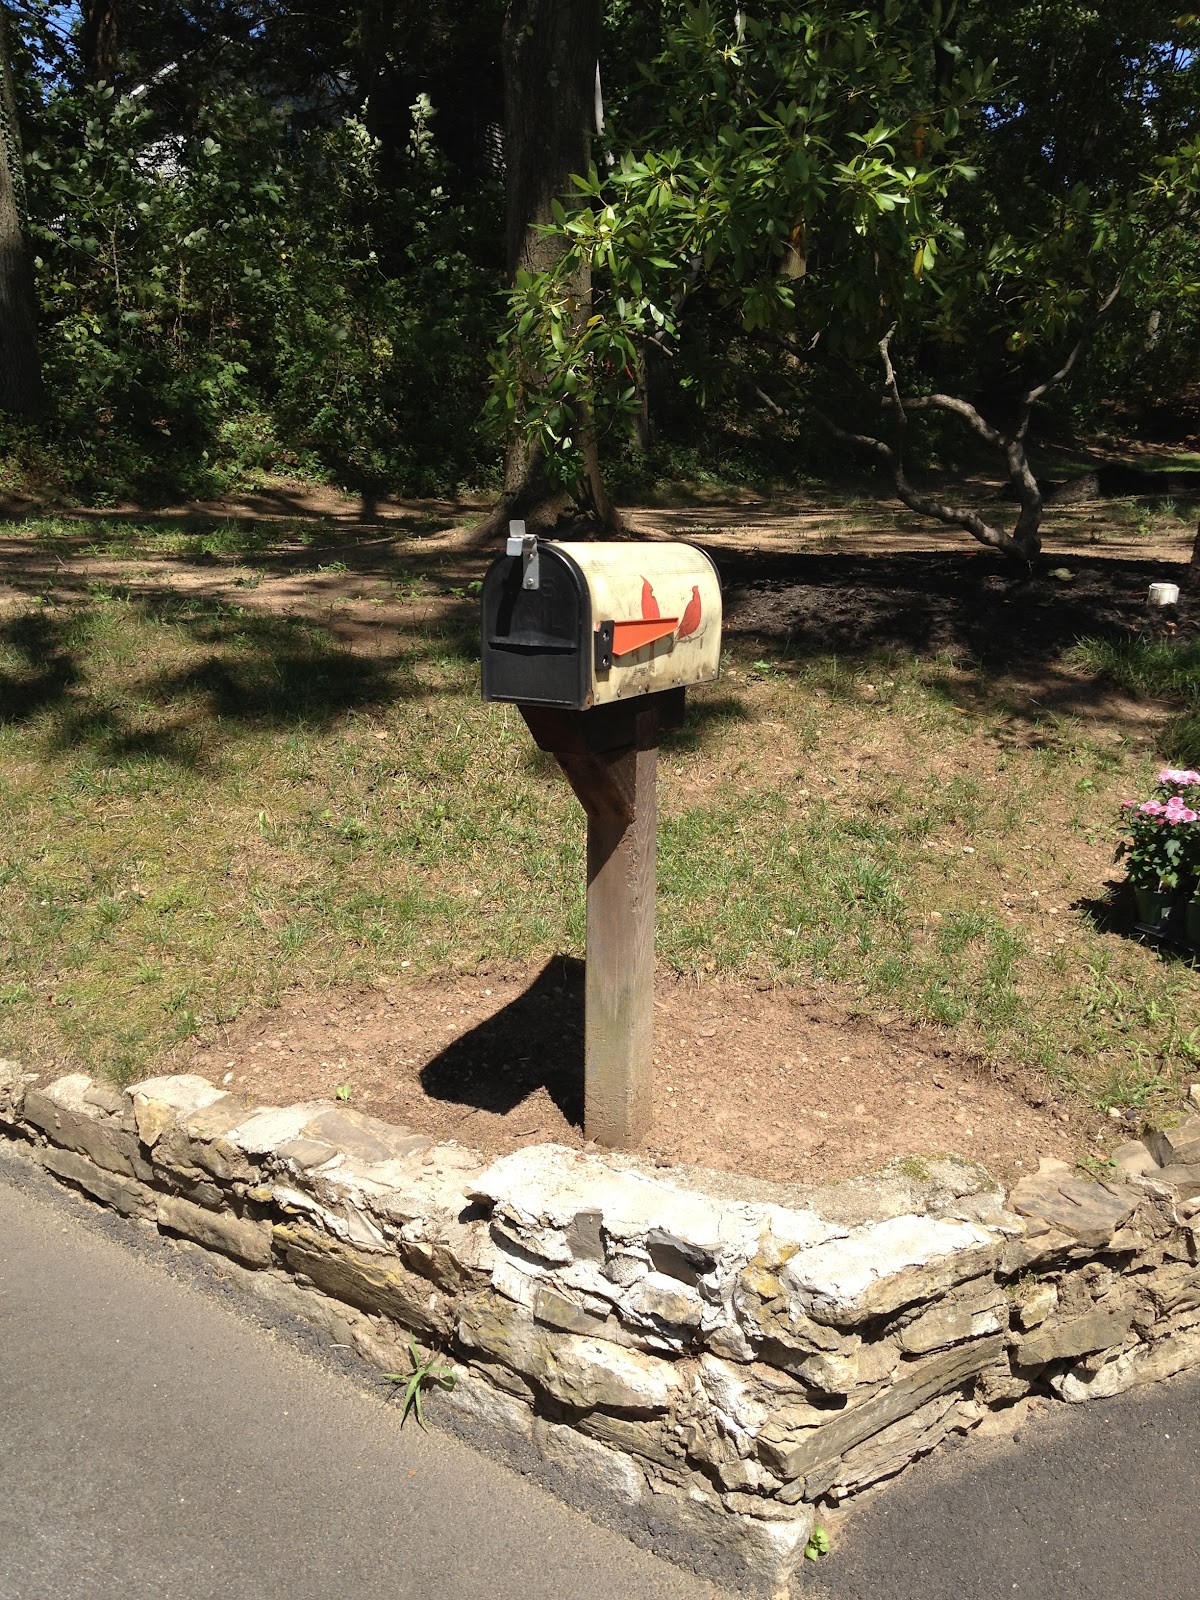
This time we aimed those awesome taming skills at our unkempt jungle surrounding our corner lot.  I forgot to take "before" pictures of all the whole jungle, so I here are a few of the untouched areas.  Just imagine this surrounding our whole property.


We knew our property line was somewhere in the the middle of that whole mess...we just didn't know how much of it was ours.  We could never find the middle marker, but we finally came across it on my parent's last visit.  And it turns out, most of this hilly disaster was ours.  Yay...we had more land than we thought, but holy moly, did we have our work cut out for us. :-/

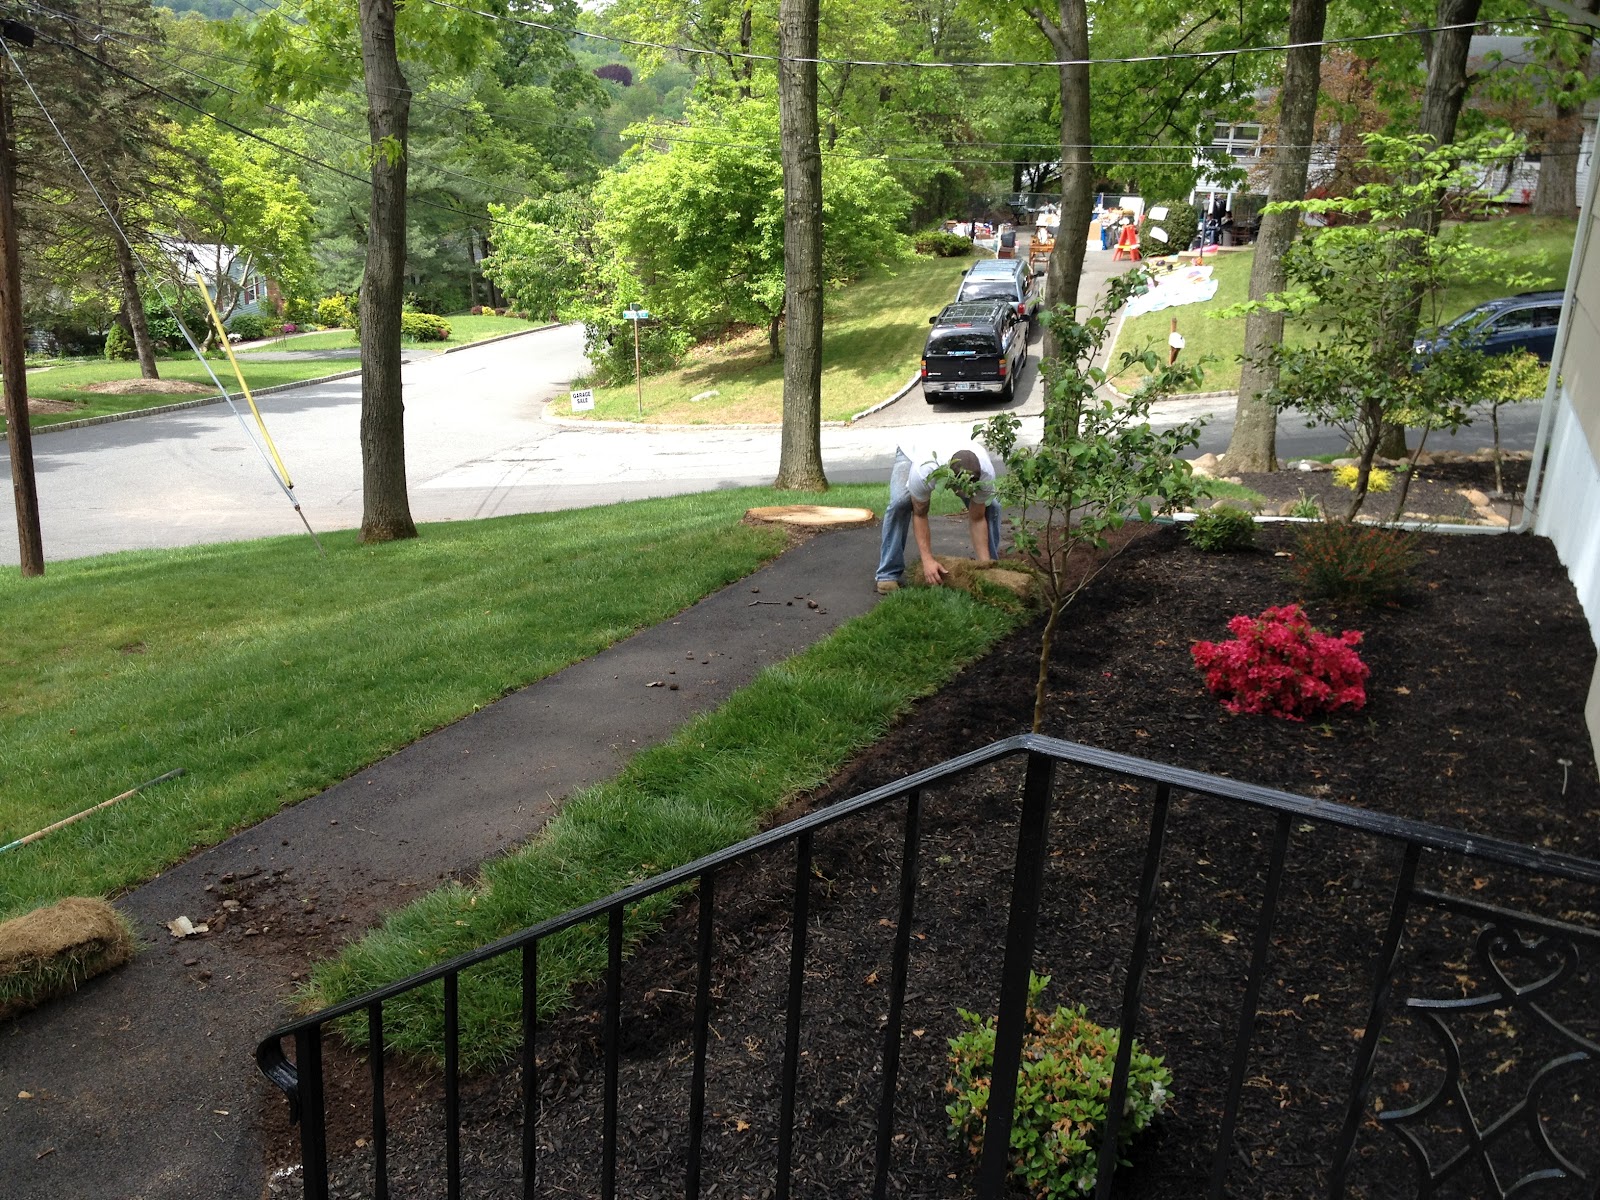
Thankfully, my parents have more energy than any twenty-something I know, and they tackled that hill and all the poison ivy it could offer up!  After a few days, we could see dirt...and a couple cute rock walls, and some ivy ground cover.


And would they stop there?!  Of course not!  We decided this would be a good idea...


Holy mulch pile!!  The next morning, we spent the first half of the day spreading this over the newly cleared areas.  The difference fresh mulch makes is amazing...plus, we are hoping it'll keep some of those weeds from popping back up at full speed.


We still have a heck of a ways to go, but the difference in our yard from where we started is incredible!  And the amazing memories we have of transforming our home with our family can't be beat. :)

Anyone else take on a unruly landscape lately?!

Mailbox and Mums

September 27, 2012


Fall is clearly in the air, and all over the blog world.  I have to admit that I am loving every minute of it!  After a summer of record high temps and zero rain, the crisp, cool air is a welcomed change.

To go along with some interior autumn decorating I’ve done {more on that to come}, the hubby and I decided that our mailbox could use some season-appropriate sprucing up.  Ideally, we would love to replace our entire mailbox.  Its old, and definitely not our style.  The poor thing has definitely seen better days, and I think it was even recently hit by someone….possibly the new garbage truck our town just purchased?!?  Now the lid won’t close all the way, which means it’s become a wonderful structure for spiders to call home.  YUCK!

I always thought I’d remove the cracked plastic sleeve and spray paint it a fun color.  But upon closer inspection, the sleeve is majorly screwed into the mailbox, and those screws and some other areas, have become rusted.  Soooo we are going to make do until we save up for a new one.  And truthfully, a new mailbox isn’t at the top of our priority list.  We might have this pathetic thing for a couple more years.  {Please don’t judge!}

So to make our mailbox less heinous to look at more tolerable, we decided we should create a mulch bed around the base and plant some pretty mums.

Hubby already pulled up what little grass we had in that area before I could snap a picture…so here is as “before” as I could get for you. ;)


And after we planted some mums…


And after we watered and mulched…


The key for this project is to not focus on how grimy our mailbox is, but to look at how pretty it’s base is now. :)  Yea, let’s just do that…because the plastic cardinal sleeve is beyond sad at this point.

Oh, and for sake of keepin’ it real, I’d like to point out that we planted these in say mid-August {yup, we totally jumped on the “hey fall is right around the corner” bandwagon}, so the mums were already in bloom and have since lost their flowers. :(  At least we still have some mulch and greenery around the mailbox, right?!?!

Anyone else in dire need of a new mailbox?

Insta-lawn!

August 14, 2012


A couple weeks ago, the hubby and I purchased some mulch so we could continue this process that we started earlier this year {and here too}. All was fine and dandy in the world of our new mulch beds until we had some torrential, and I mean torrential, downpours in our area recently.  We were actually thrilled for the rain {can anyone say country-wide drought??}, but the bed above our rock wall was not. 

While the rain was pouring down, we were eagerly peering out all the windows of our home.  It was a rare chance for us to truly see the pitch of our property and where the water runs, because, well…there were streams of water going everywhere!!  Luckily, everything, including our newly hardscaped backyard, was sloped perfectly and things were draining away from our home and continuing downhill in our neighborhood.

All was well in the world of water drainage, except for the aforementioned bed.  That poor thing took quite the beating because our backyard looks like this. :(


See all that dirt?  Well mix it with heavy rain and it turned into a mud river that poured over the poor mulch bed.  Yup, right through it, down the rock wall, and then down the street...in all it’s dirty, brown glory.  Shockingly, our mulch did its job and pretty much stayed put, but that muddy river poured over it in several places leaving ugly streaks.

The solution to this issue?  {Obvious answer} having a backyard that is actual grass and NOT dirt!!  Unfortunately, we know achieving a grassy backyard doesn’t happen overnight.  The hubs has been working hard at getting sections to start growing, and so far, it’s working out as well as can be expected, especially when you consider the obnoxiously warm, extremely dry summer Jersey is experiencing.  {For proof, see the brighter green grass sprouting at the bottom of the pic.}  But until we have a serious barrier of grass on our slight hill, that mud will continue to flow…so we turned to an option already used in our front yard…sod!  Ahhhh, the glorious insta-lawn!  

While we aren’t bagillionaires and cannot afford to sod our entire backyard, we can certainly afford a couple strips of it!  So we {hubby} strategically placed those strips above our rock wall bed, in hopes that it would take root and provide some much needed protection during rain storms.  


It didn’t hurt that we had enough left over to sod some areas around our new patio too! :)  {These photos were not taken on the same day as the ones above...note, the overcast-ness.  Bleh.}


Since putting the strips down, we've had another torrential downpour and they totally did their job!  The sod kept the water from rushing over the rock wall bed, and it even started taking root.  It looks like this might be our second successful venture into the world of sod.

We even added a bag of river rock to our patio steps to naturally fill in gaps left from the patio construction.


Every little bit helps us move towards a finished backyard! Anyone else tackle some outdoor stuff lately?

Finishing Touches...For Now.

August 02, 2012

While still basking in our post-patio installation glow, the hubby and I realized there were a couple things that needed to be accomplished ASAP to give the area a more completed look.

The first thing was small, but annoying.  We had cable wires, splitters and telephone lines that were stapled to our siding, starting from the front of the garage and going all the way around the house to the fireplace.  It was never a cute look, but it also wasn’t super obvious because, well, the rest of our backyard was in such disarray that you didn’t have time to notice it. ;)  That all changed when our awesome patio was finished.  When you looked at the area, you couldn't help but notice the now-staring-you-in-the-face-eyesore…and so it was ripped down ASAP. 


The hubby and my dad took care of removing the wires and staples, and with a little touch up paint, it was like they were never there.  {We never used the old cable and telephone lines.  Instead of traditional cable and phone service, we had Verizon come and install Fios, so we knew it was a-okay to tear down the old lines.}


The second thing was a much bigger deal than just a few wires, although it was crossed off the list on the same day…building a new, NON-rotting, set of steps to access the backyard from our screened-in porch.  Our patio guy scheduled some of his workers, who are also carpenters, to come by and put together something much more safe and substantial.  The project took quite a few hours and it was well worth it when we saw the finished product.  {The stairs have been sanded and stained since these pics…update coming soon!}


And finally, the last thing that really transformed the area into a done-deal was when hubby and his dad spent an entire day putting lattice up on the bottom of our porch.  It was a heck of a project, but the results are 100% worth it.  Hubby even took it a step further by painting the wood strips used to secure the lattice and he continued our mulch and flagstone path that wraps around the fireplace side of our house.  I used to despise that area, and now it’s one of my favorites!!


Of course, just because we crossed all of the above off our list doesn’t mean these spaces are anywhere near complete.  We still need to grow grass in the backyard…and the hubs is working diligently at it.  He’s done a great job, going in small sections.  Raking…seeding…raking…watering…watering…watering…watering.  So far, we’ve been pretty successful!  Grass is popping up in the two areas he started on.  He just did area #3 yesterday, and we are keeping our fingers crossed it takes like the first two did.


Both the screened-in porch and patio need to be “decorated” too.  This is definitely not in the budget this year, and quite honestly, it might not be in the budget for a few years.  Outdoor furniture is crazy expensive, and so we are using what we’ve got!  My parents found an amazing end-of-season deal on some chairs from Lowe’s last year, and purchased 6 for us {the green and white ones in the pictures}.  Then they found 3 great little side tables from Walmart this year {little oil-rubbed bronze ones in the porch}.  I found a sweet deal on two zero gravity lounge chairs {from The Foundary} and purchased those to lay in the sun {the dark chairs in the porch}.  And best of all, I got a dining table and 5 chairs from my boss, for FREE, because his family was putting their old set to the curb.  Oh, and the previous owners happened to leave an old lounge chair at the house when they moved out. {Both of those things are sitting on our patio in the pictures.}

Does any of this furniture match?  No.  Is every piece what we’d “want”?  Not necessarily.  But is it all functional and does it give us the ability to enjoy the awesome space we have?  Yes!!  And that is what matters.  We are so blessed to even have what we have...and that includes our new outdoor space that has become a favorite hangout space for us.

Don’t get me wrong…knowing our budget is nonexistent doesn’t stop me from daydreaming about the furniture I’d like one day, or how I might spray paint some pieces to match, or what type of stripe or stencil would look perfect on the porch floor, or how we mightttt be able to stretch our budget to purchase the lights we want to hang from our porch ceiling.  It’s so much fun to dream and get the creative mind going, but it never distracts me from recognizing just how lucky we are to have what we have, and who we have, and to be right where we are. :)

Sod Story

May 17, 2012

Remember when I revealed our beautifully mulched beds?  Don't think I wasn't aware of the weird dirt path that was left in front of the one bed.  I swear...we had a good reason for that!


And that reason is two-fold:  first, we think the bed is just a touch too big {considering the fact that we have so many large beds on our property}, and second, we weren't the biggest fans of how the black mulch looked right up against the asphalt walkway.  We preferred breaking up all that darkness with a nice patch of green grass.  {By the way, we know an asphalt walkway is not the most attractive thing, but it will remain until we hit the lottery and can replace it with some puuuurty stamped concrete steps.}

We could have planted grass seed in that strip, but that'd require us to have the patience to watch the grass grow, and we'd also have to pray the seed didn't make it's way into our newly mulched bed.  We knew the quick and easy solution would be to lay down a couple strips of sod.

At first we were apprehensive about how much it might cost, but it turned out to be very reasonable since we were doing such a small area.  My hubby was able to get 7 rolls for $32.  Not too shabby for immediate results!

Here is a pictorial play-by-play of my handsome hubby taking care of the sod laying.


And here is our insta-lawn after it's first mowing adventure!  Luckily, the strips took well and seem to be thriving in our yard. :) 


Anyone else have experiences with sod?  If we were bagillionaires we'd totally sod our whole backyard so we could finally have a lawn there too. :)