My mom picked up a set of director's chairs from Savers the other day specifically for me to redo. Isn't that sweet?! She knows me all too well. But in my excitement to get started, I failed to take a good before picture. I really should know better. The best I can show you is this:
So you can't really see the top of the chair, and you can just see part of a leg from the other chair... These two chairs are twins and are in great shape, unlike my previous director chair makeover. These twins just need a little funkifying. And I have a tie-dye kit, picked up when on major-markdown, in my arsenal of redo supplies just waiting to be used.
It has been a long time since I have tie-dyed anything. I had fun twisting the fabric into knots, not knowing what the finished look would be. But I think I was the only one having fun. Paris was upset that I was not playing with her and the squeaky squirrel:
Next I added the dye to the fabric. And even with gloves, my fingertips turned a pretty purple color. Then I covered the dyed knots in plastic wrap to let them set overnight.
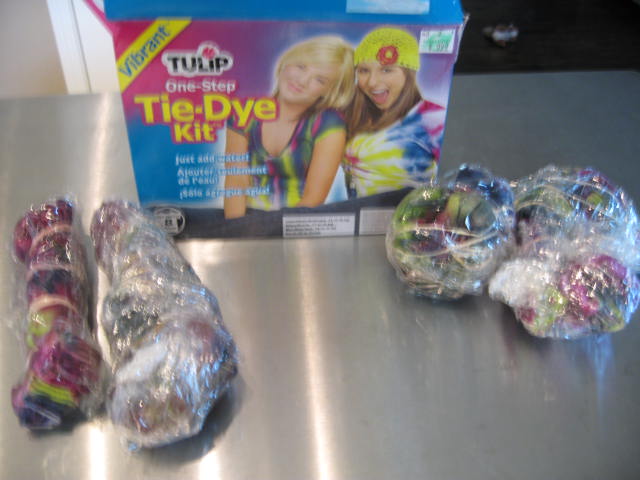
The next day I unwrapped the knots and cut the rubber bands. The patterns are defined and bright. I love it!
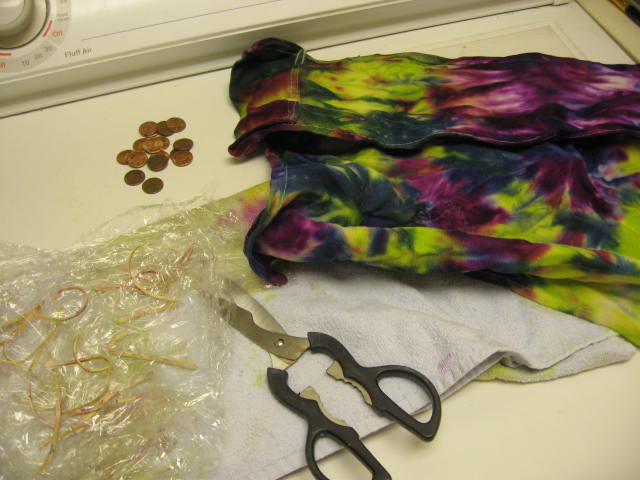
However, after washing in hot water like the directions called for, the fabric looks muted. It isn't bad, just not as good as pre-wash. And since the fabric looks a little pale, I think the wood on the chairs needs to be a bright color now. Enter a little blue spray paint. Fast forward past the boring dry time and here are the twins in their new funky-state:
So that's my free and fun tie-dye director chair makeover. Super easy too! Anybody have any great tips for tie-dyeing? How do you keep the pattern bold and bright?
Showing posts with label thrifty makeover. Show all posts
Tie-Dye Fun
June 13, 2011
Labels:
DIY,
furniture makeover,
Remodel this house,
thrifty makeover,
tie dye
Spray Paint + Mod Podge = Best Friends
March 28, 2011
I'm back, reporting in on another super easy, super thrifty, super cute makeover. The lucky makeover item this time is a thrift store tray. Doesn't it just scream h-e-l-p:
Yep, I thought it needed a funky makeover. Rustic wood and a deer silhouette...no thank you! This little tray is going to get the works - spray paint and mod podge. And the best thing is that I already have all the supplies, so this $1 tray makeover only cost $1. First I sprayed the tray a bright blue....and sprayed...and sprayed. I think it took 4 coats to get the bare wood completely covered since it kept soaking up the paint. I probably should have primed it first.The tray already looks 100 time better, but still not good enough. After the tray was dry, I cut a piece of leftover fabric to cover the deer silhouette. I really didn't want to see that anymore...not really my style. And after the fabric was cut, it was time for phase two - mod podge.
I covered the bottom of the tray with mod podge and then stuck the piece of fabric down. Then I gave a good coat to the top of the fabric. Set the tray to the side and let it dry.
After the mod podge dried, I added one more final detail to the tray - a thin strip of ribbon around the bottom of the tray. This really crisped it up and made it look more finished. I hot glued the ribbon and then added a final coat of mod podge to the entire tray.
One dollar, that's it. Spray paint and mod podge really are best friends.
Stool Makeover
February 22, 2011
I didn't need this stool at all. I have no place to put it. But when I was making a trip through a local flea market, it caught my eye. And it was priced at only $6. Hello stool, nice to meet you. You are coming home with me.
The lines on this little stool are so cute. However, the hard as wood seat is not comfortable at all. No worries, I gave this stool a quick little makeover to make it uber-chic. First I cut out a piece of 1" foam for the seat to make it comfortable to sit on. After all, it is a stool and should be comfy.
Then I used a piece of scrap fabric to cover the foam. Just use a stapler to fasten the fabric to the bottom of the seat. Trim the excess fabric away.
This stool is much cuter already, but still not complete. I spray painted the legs a rich emerald green for that extra something-something. Dad, I know you hate green, but give this a chance.
And look at this stool now.
Want to know how much this mini makeover cost? $6. Just the price of the stool. I already had the foam, fabric, and spray paint. Now I just need to find a place for this little stool. Anybody need a stool?
The lines on this little stool are so cute. However, the hard as wood seat is not comfortable at all. No worries, I gave this stool a quick little makeover to make it uber-chic. First I cut out a piece of 1" foam for the seat to make it comfortable to sit on. After all, it is a stool and should be comfy.
Then I used a piece of scrap fabric to cover the foam. Just use a stapler to fasten the fabric to the bottom of the seat. Trim the excess fabric away.
This stool is much cuter already, but still not complete. I spray painted the legs a rich emerald green for that extra something-something. Dad, I know you hate green, but give this a chance.
And look at this stool now.
Want to know how much this mini makeover cost? $6. Just the price of the stool. I already had the foam, fabric, and spray paint. Now I just need to find a place for this little stool. Anybody need a stool?
Labels:
Remodel this house,
thrifty makeover
Subscribe to:
Posts (Atom)


